Six PV Design Tips for Difficult Roofs
In the world of rooftop PV, not all roofs are created equal. Many new and existing buildings have roofs that are ideally shaped, sized, and oriented for solar. All new homes in California are built to be solar-ready. But that’s not the case everywhere. Look around your neighborhood and you’ll likely see plenty of buildings with oddly shaped, heavily shaded, or obstruction-covered roofs. Despite their complexities, these “difficult” roofs present an opportunity for PV designers and contractors alike. In this article, we outline the best practices for designing PV systems on obstructed, space-constrained, or otherwise abnormal commercial roofs.
1. Start with an in-depth site evaluation.
Assessing a site in-person will speed up all other steps of the design and engineering process, especially for buildings with multiple roof angles, roof types, and/or interconnection points. It’s tempting to rely on satellite or aerial images to help save time on the assessment, but generally these desk reviews will miss something and require re-work later.
During the site walk, be sure to investigate the roofing and structural components as much as possible. The “as-built” drawings are always helpful but may not live up to their name. If you can have a roofer meet you during this visit, get their input on the roof life and any problem areas. Use a detailed checklist to take notes, measurements, photos, and videos whenever possible. When evaluating the electrical equipment onsite, make sure to capture the nameplate information and that you can actually read it in the photo. While on the roof, start thinking of potential racking solutions and pathways to get from the roof to the point of interconnection. If there is someone familiar with the building, they may have insight on open chases and if you’re really lucky, empty conduits. Be sure to identify any roof obstructions that don’t appear in satellite or aerial images and measure heights of trees and other obstructions that may cause shading on the proposed PV system.
2. Obtain a complete structural analysis of the roof.
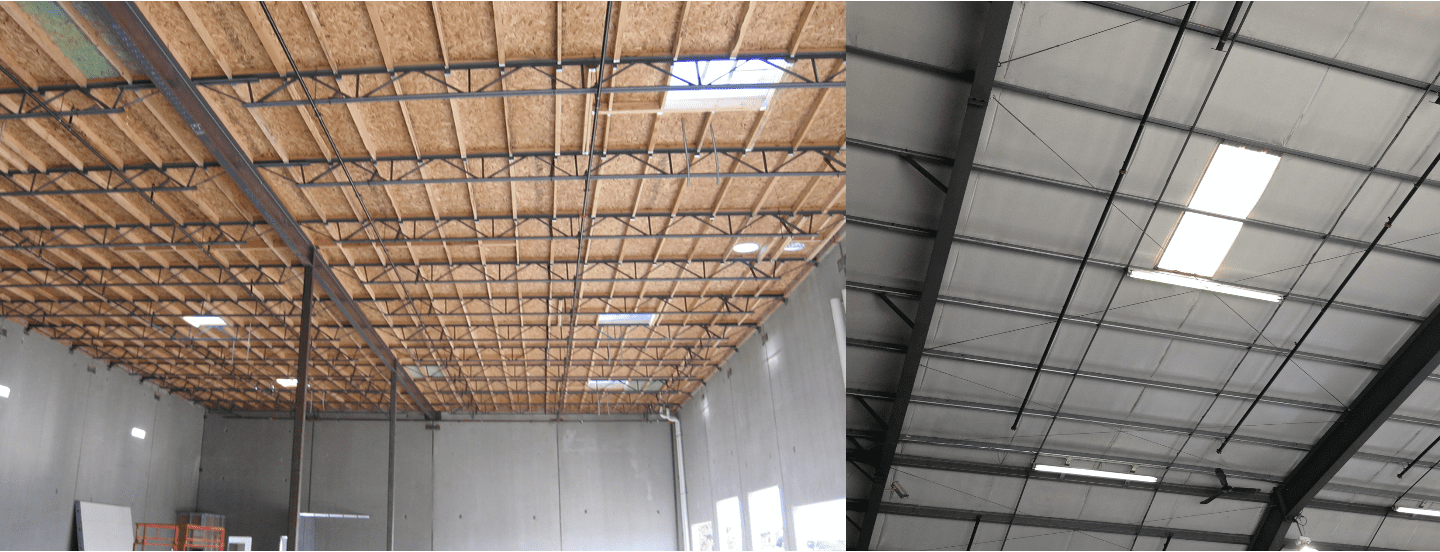
An engineer will have to assess structural integrity and roof loading for just about any commercial PV project, but this becomes especially important when working on a “difficult” roof. Existing rooftop units (RTUs) may take away some potential structural capacity as well as available area. Analysis may uncover underlying structural or permitting issues that will need to be resolved prior to starting PV installation. Identify structural or AHJ-related hiccups early, so any changes to the project timeline or budget can be communicated to the customer.
3. Verify MLPE and inverter compatibility.
When used properly, module-level power electronics (MLPEs) such as microinverters or optimizers are a great way to maximize output for PV arrays installed on shaded roofs. If you’re using MLPEs, ensure that they are compatible with all system components. Given the National Electrical Code requirements around rapid shutdown of PV system conductors, nearly all rooftop systems will now incorporate MLPEs. During the site visit it may not be critical to identify exact components, but if you do have a go-to product, knowing how those operate and interact with the inverter will be helpful. For example, if the chosen MLPE does not incorporate optimization, you will be a little more restricted by the module stringing in both string length and how the strings are routed within and around the array. This may limit the way you choose to arrange the modules on the roof.
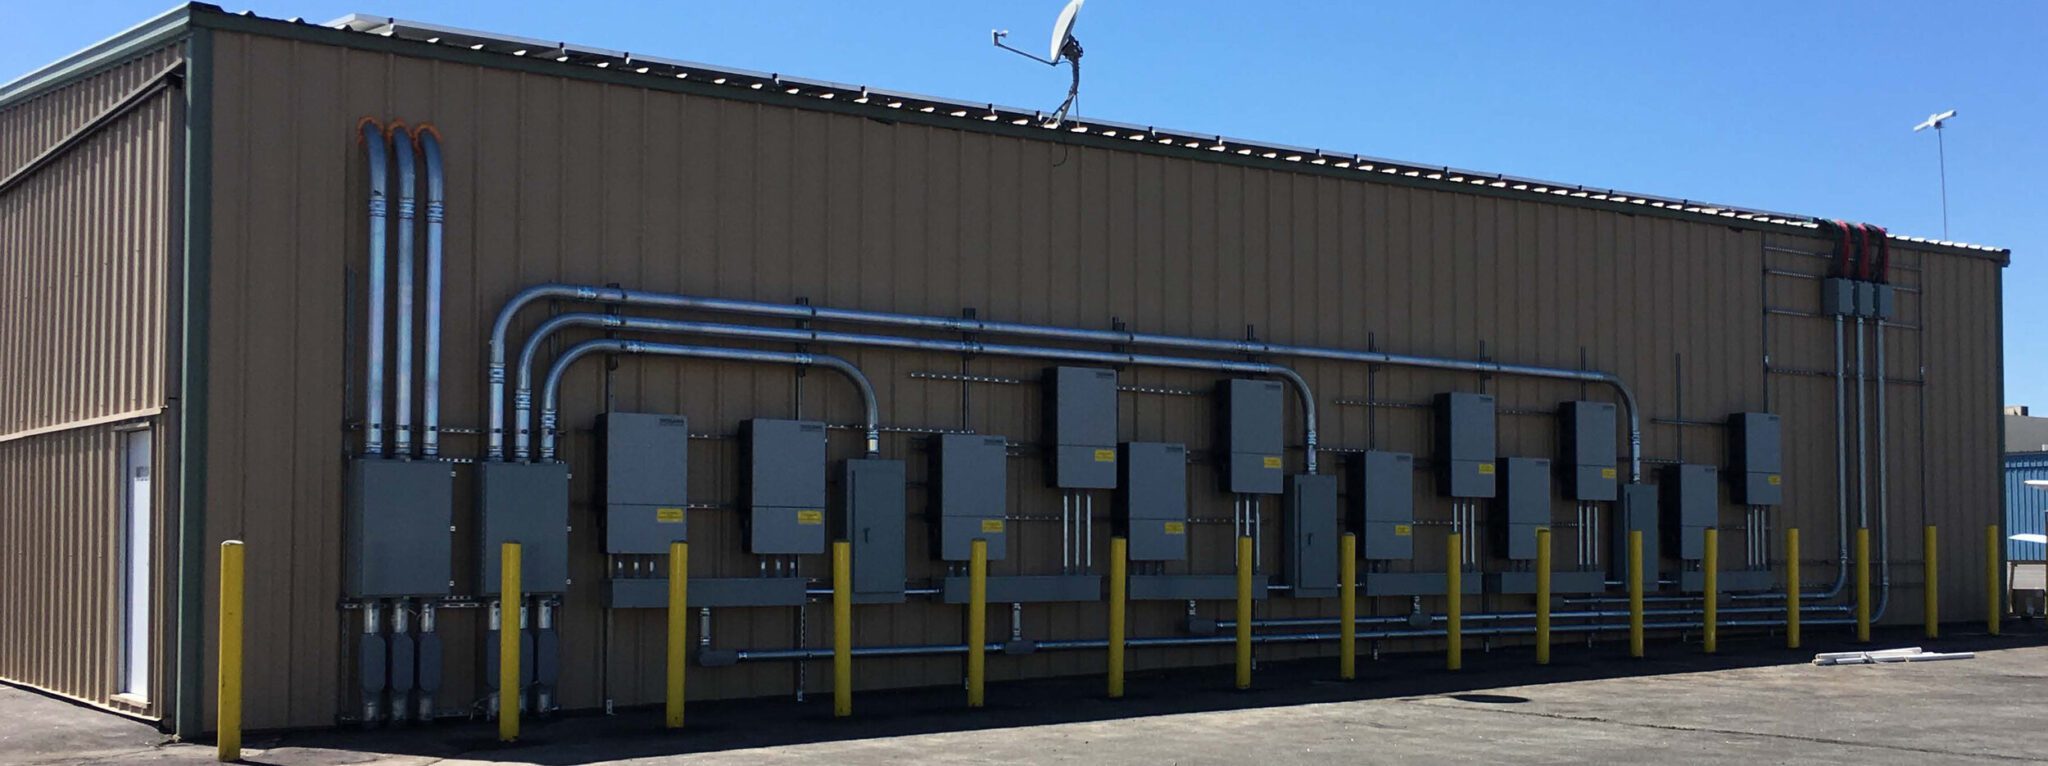
4. Thoroughly evaluate the point(s) of interconnection.
Proper grid interconnection cannot be overlooked. In commercial applications, supply side connections are very common but not always an absolute requirement. Take the time to evaluate the existing electrical service equipment and note any special issues. Can the inverters be located near the service? Is there a location for the disconnect? What is the most effective Code-compliant way of interconnecting?
It is very tempting to open up electrical panels, especially if a supply side connection is being considered. But unless you are a qualified electrician with proper training and personal protective equipment (PPE), do not open any panels. The potential consequences are just too grave. Collect the info you can, tell the client what the expectations are, and verify when it can be done safely at a later date.
5. Determine inverter location(s).
This is another thing to keep top of mind during site evaluations. Whenever possible, the inverter(s) should be easily accessible and at ground level. Consider that inverters will need to be accessed for any O&M during the system’s lifetime, then place them accordingly. With the need for MLPEs within the array, the need for inverters on the roof has greatly diminished. A good general goal is to locate inverters on the ground level. This isn’t always an option, so keep an eye out for other locations during the site walk and notate that as you go.
No matter the location, roof or ground level, try to find locations where the inverters will not be in direct sunlight during peak power-producing hours. This will help minimize heat gain and should increase inverter longevity.
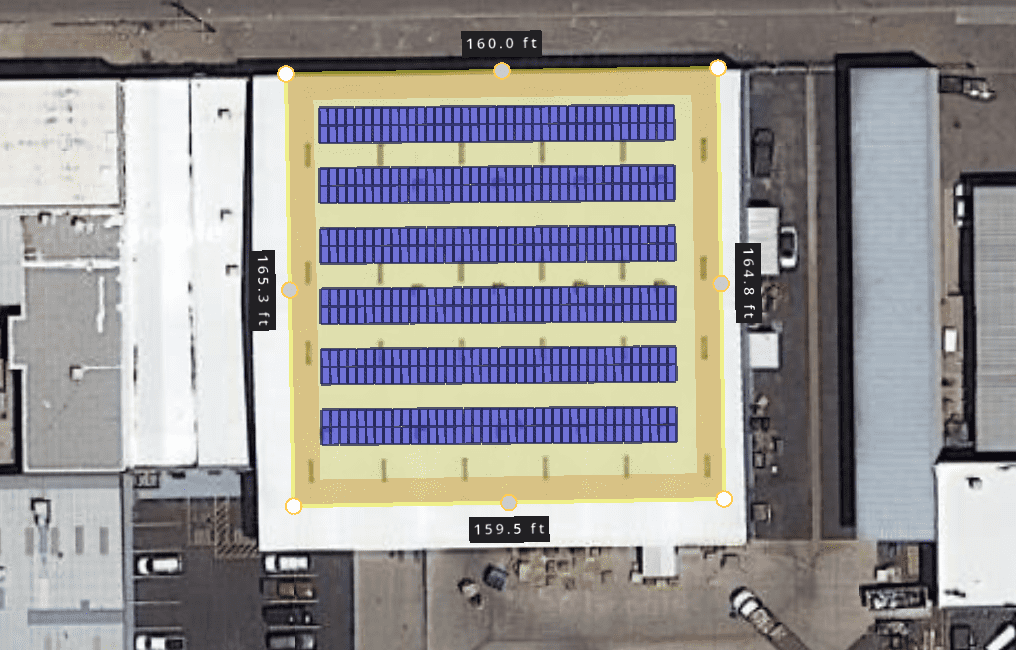
6. Perform detailed energy modeling.
Once the site has been evaluated and measured, build a PV system model to assess the effect of roof obstructions on array production. This may illuminate other portions of the roof that are better suited for PV, and is a low-cost method of testing different modules, racking, and inverters to find the optimal configuration for the site. Detailed production estimates also help to set realistic expectations for the customer. These models can also help drive the conversation around array locations and help your customer visualize the final product.
As rooftop solar is adopted more widely, the likelihood of finding an existing rooftop with minimal obstructions and few design complexities decreases. Many “perfect” roofs have already been covered in PV, but the less-than-perfect roofs should not be overlooked.
As outlined above, the more you can be proactive, the better. Check out the site in-person when possible. Investigate any possible engineering, AHJ, or utility-related requirements before they become a delay. Take advantage of modeling tools to find optimal array locations and system configurations. And most importantly, set realistic expectations and exceed them with steady communication with your customer throughout the entire design process. By following these best practices, you’ll be ready to tackle just about any rooftop that comes your way.